
 Your name is Bond, James Bond. The Goldeneye team at Rare Ltd. have been squeezing everything they can out of the Nintendo 64 system to make a first person, cinematic experience that puts you into the action of the thriller.
Goldeneye 007 features action from Russia to Cuba, the likenesses of virtually all of the Goldeneye characters, and universally known Bond signatures such as the theme music, wild chase scenes and heart thumping escapes. As the British super agent, players will use a host of weapons to stop the Janus Corporation`s plot of nuclear extortion. That`s about all you have to worry about for plot. As in the movie itself, the plot is simply a means to cool action scenes.
From a detailed first person perspective, players look out on a world taken directly from the movie. In most areas, Bond has to think on his feet, avoid shooting enemies, penetrating installations and blowing up everything that looks expensive. But Bond is also the most versatile man on earth. Put him in a Russian tank and he will charge through bustling city traffic with no more concern than a hungry weasel in a chicken coop. Other vehicles will come into play, as well, but the flashy BMW didn`t make the cut. The designers also hope to maintain a sense of reality in the character of Bond. For instance you can`t carry an arsenal around with you. At most, you`ll be able to pack two weapons at one time. And Bond doesn`t magically heal himself using medical kits found scattered randomly about. When he`s hit, it reduces the effectiveness of his body armor.
Goldeneye explores many of the key areas in the movie, including the high dam, the nerve gas plant, the Russian base at Severnaya, the Soviet statue park, the military archives, the chase in St.Petersburg, the depot and missle train, and the antenna complex in Cuba.
Other areas that are merely glossed over in the film are also used as major levels in the game. You`ll be able to explore the destroyer, infiltrate a missle silo, dodge troops in the Cuban jungle and descend into the drainage caverns beneath the huge flooded antenna. The developers used actual blue prints of the set designs from the film and made numerous trips to the studios near London during the production of the movie.
The game designers spent much time thinking about their license to kill. The biggest advance in game play is that you will be able to shoot up, down, and all around at any angle. Movement through the game world has also been improved over most 3-D, first person games. Bond doesn`t just stand, walk and run. He (or rather you) will be able to kneel, climb ladders, walk up stairs realistically and move forward at a variable rate due to the Control Stick of the Nintendo 64 controller. Even more intriguing, you can control the volume of Bond`s footsteps by slowing down or speeding up, which may be just the trick you need to sneak past a wary guard.
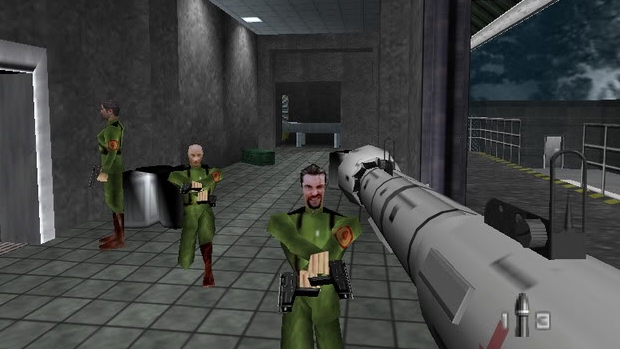
Over the decades, James Bond has tracked down some of the most colorful villains in movies: Blofeld, Jaws, Goldfinger, Dr.No, and Scaramanga. In Goldeneye, you`ll face the treacherous Trevelyan (006), the cruel General Ourumov, and the twisted Onatopp. Digitalized texture maps of the actors` faces have been painted on the polygon figures to give an added sense of reality. But the developers went beyond using the latest villains. They also plan to include hidden areas featuring characters out of Bond`s past such as those mentioned above. Bond himself might even be shaken if not stirred by this high tech adventure of his illustrious career.
Characters Goldeneye007 is shown from the perspective of James Bond. Along the way, you`ll encounter characters from the film such as Natalya Simonova, Xenia Onatopp, Alec Trevelyan, Valentin Zukovsky, General Arkady Ourumov and Boris Greshenko.
On multiplayer level you`ll be able to choose from a wide assortment of different characters to be. They include Moonraker tecnicians, May Day, Baron Samedi, Jaws, Russian Helicopter Pilots and more.
Scenarios
There are 8 multiplayer scenarios for you to choose from: Competitive Shootout, free-for-all, two on two and two on one. Special match themes are based on other Bond films:
The Man With The Golden Gun– The player with the Golden Gun can defeat enemies with a single shot.
You Only Live Twice– you only have two lives in this round.
License To Kill— where every hit is fatal.
The Living Daylights—the winner is the player who carries the flag the longest.
Each mission level comes with a full debriefing. With each debriefing, you`ll receive six or seven pages in a dossier filled with confidential information from MI6. The first file always outlines the primary objective. You cannot continue to the next mission until you complete the objectives of the current mission level and get out alive. M, Q, and Moneypenny will also provide brief summaries to you as the game proceeds.
The number of objectives for each level increases with the difficulty level you choose. The most common objective for each level is to minimize civilian casualties. This is NOT Doom!
Guns
Sure, you`ve got lots of nifty gadgets, courtesy of Q, and weapons. But, the trick is to know how and when to use them. Don`t rely on them as a crutch. For Goldeneye007, Bond will carry covert modems, door decoders, automatic bomb defusers and high speed copying devices.
There are other special weapons hidden in crates and alcoves throughout the game. The savvy player will look for these extra special devices. The really resourceful player will figure out how to get multiple uses from each gadget. HINT HINT!
As a player, you are automatically fitted with handguns, automatic weapons and explosives. With the handguns you can use silencers, and some of these handguns have the potential to blow through doors. The automatics will hold off large contingents of enemies, BUT with the recoil your aim will be thrown off if you fire repeatedly.
1.) PP7: Has silencer capabilities with minimal stopping power. Low recoil. Magazine of 7, with a max of 800 bullets.
2.) DD44 Dostovei: VERY loud. Not recommended for enclosed area(Facility for example). Low recoil. Magazine of 8, with a max of 800 bullets.
3.) Golden Gun: Possibly the strongest of all the hand-guns. One shot SHOULD kill. Low recoil. Magazine of 1, with a max of 100.
4.) KF7 Soviet: Zoom capabilities. The Russian guard gun of choice. Medium Recoil. Magazine of 30, with a max of 400.
5.) Remote Mine: May not be a gun, but it is one very effective explosive. Best for out- door use :-). No recoil. Magazine of 1, with a max of 10.
6.) Timed Mine: Possibly the weirdest explosive because of its abilities. Takes about 3-5 seconds to go off. NOT recommended for any use whatsoever. Magazine of 1, with a max of 10.
7.) Proximity Mine: The very best of explosives. When a guard comes by, it will automatically explode. Doesn`t no the difference between friend or foe. Be careful! Magazine of 1, with a max of 10.
8.) Grenades: Toss a grenade; hope for the best. That`s all there is. Just be careful because like the timed mine, it takes about 3 seconds to explode. Magazine of 1, max of 10.
9.) Sniper Rifle: Zoom and silencer capabilities. The best gun for long-range killing. Useful for stages like Dam with the open areas. Magazine of 8, with a max of 400.
10.) D5K Deutsche: Maximum stopping power. Magazine of 30, with a max of 800.
11.) ZMG(9MM): Fast-Firing Sub-machine Gun. Very effective. Magazine of 32, with a max of 800.
12.) Klobb: worst recoil. Recommended to you 2 to make up for the sluggishness of just one. Magazine of 20, with a max of 800.
13.) Phantom: Very Good. Almost identical to the D5K Deutsche in terms of sound and stopping power. Magazine of 50, with a max of 800.
14.) US AR33 Assault Rife: Zoom capabilities. Has less recoil than the KF7 Soviet. Great with 2 at one time! Magazine of 30, with a max of 400.
15.) RC-P90: The best gun out of the entire Bond Arsenal. Truly one of the best guns out there, and just imagine with 2 at one time! Almost an endless Magazine of 80, with a max of 800!!!!!!!!
16.) Laser: Possibly one of the most useful guns because of its endless magazine of 0!! That`s right, there is an infinite amount of the “bullets” to go around, so have fun! It can also shoot through doors just incase some person is about to kill you.
17.) Watch Laser: Not exactly a weapon, but more of a gadget. This has an important use in the “Train” level of Golden Eye 007. It can be modified for a weapon IF USED UP CLOSE. Magazine of 1-300, with a max of 300.
18.) Rocket Launcher. This behemoth has the most effect stopping power. It releases a missile to anyone who wants to die instantly. Just don`t get to close, cause you will die too! Magazine of 1, with a max of 3.
19.) Grenade Launcher: With this weapon, you can just about destroy everything just like the Rocket Launcher. Alittle bit less accuracy, though. Magazine of 6, with a max of 12.
20.) Automatic Shot-Gun: This gun/rifle can clearly hurt an enemy. Has the ability to totally destroy certain objects as well. Magazine of 5, with a max of 100.
21.) Shot-Gun: Not exactly the “prettiest” thing you have, but just like the Automatic Shot-Gun, it does have an effect towards enemies as well as certain objects. Magazine of 5, with a max of 100.
22.) Throwing-Knife: Take a stab at chucking these bad-boys at bad guys and see what it does. “Re-defines stealth”. Magazine of 1-10, with a max of 10.
23.) Tank: I don`t like to consider this a weapon, but with the All-Guns mode, it is. This is 3 times more effect then the Rocket Launcher, therefore 3 times more likely that you will be killed by the explosion. Magazine of 1, with a max of 50.
24.) Tazer Boy: One of the most secret weapons. Can only be used in All-Guns mode. Little is known about such a weapon, except that you can mainly only use it up close to get the “full effect”.
25.) Your Hand: When all-else fails, this is your only means of survival. It obviously has an infinite amount of “bullets”.
Gadgets
1.) Plastic: A bomb that with kill. Enough said. C-4 explosives. Watch out………
2.) Bungee Rope: Automatically activated as you throw yourself off the dam in Byelemorye Dam. Also known as the Arkangelsk Dam.
3.) Bomb Defuser: Used for when Bond, James Bond, needs to defuse 2 bombs on the Frigate, the “La Fayette” in Monte Carlo. Just go up to the bomb and press A or B or Z.
4.) Key Analyzer: Useful in Severnaya when you need to copy the infamous Golden Eye key. Has been modified by “Q” and is now said to be quite easy to use: just walk up to it and press “Z”.
5.) Covert Modem: Used in the Arkangelsk Dam. Just press “Z” and aim it with “R”.
6.) Camera: The 007 camera used in many Bond movies. Just press “R” to aim the camera and take pictures!
7.) Door Decoder: This is extremely useful in the Facility because you need it to fulfill all of your missions. Dr. Doak will give it to you, but first you must find him………
8.) Detonator: You will automatically have it once you get any of the mines. Just press “Z” to blow mines up.
9.) Tracker Bug: The Janus Syndicate can run, but it surely cannot hide. That is because you have the tracker bug which you must use it in the Frigate, the La Fayette. Just press “R” to aim and Z to throw.
10.) Data Thief: Used to hack the passwords in Severnaya Bunker. Just go up to a mainframe and press “Z”.
11.) Watch Magnet: Also useful in the Severnaya bunker because with out it, you would be stuck in your jail cell. Just aim “R” and press “Z” to activate.
Controls
A:) The “A” is the Control Stick. This allows for 3D Movement in the 3D “terrain”. To move Bond, press “up” on the control stick to move Bond forward; press “down” to move Bond backward. The same goes for right and left.
B.) The “B” is the “B” Button. In GoldenEye 007, this is used as the “action” button. To open doors, just go up to one and press “B”. It will open. Also, you can use it to reload your magazine clip. While after firing your weapon, you can press “B” and it will reload.
C.) The “C” is the “A” button. This button is only used for scrolling forwards through your weapons. To scroll through backwards, just press “Z” and “A” simultaneously.
D.) The “D” is the “C-Buttons”. The “C” buttons are used to look up, down, strafe left and strafe right.
E.) The “E” is the Control pad. It acts just like the “C-Buttons”.
F.) The “F” is the start button. The start button is used to look at your deluxe “Q” Watch. This is the options screen where you can select between Aborting the mission, Sound options, weapons, or controlling.
G.) The “G” is the “Z” Button. The “Z” button, also known as the trigger button, is used to fire your weapon, and use any items that you have selected using the start option(s).
H.) The “H” is the “R” button. The “R” button is used for targeting. Just press “R” and the cross-hair will appear. Aim the cross-hair by holding the “R” button and moving the cross-hair using the control stick. It can also be used to throw objects like the tracker bug or the covert modem.
I.) The “I” is the “L” button. The “L” button is used just like the “R” button.
Character Backgrounds
1.) James Bond (007): The main character and hero of GoldenEye 007. You are 007, assigned to save the MI6 as well as the world from a Russian Space Weapons Facility. With a license to kill, you are forced to go to places like the Arkangelsk Dam, to Severnaya and even St. Petersburg.
2.) Natalya Simonova: Who James Bond rescues while trying to save himself in Severnaya. She is an Assistant Programmer at the Severnaya Space Station Facility in Russia, who almost gets killed by Russian guards in the second bunker.
3.) Alec Trevelyan: Friend of Foe? That is the question that you must decide for youself in GoldenEye as you and Alec Trevelyan try to save the world from the Chemical Weapons Facility in Byelomorye. He is later identified as a Lienz Cossack and Janus.
4.) Boris Grishenko: A brilliant Russian Programmer who likes to”spike” the FBI and the CIA. Was the only surviver at the Severnaya Incident along with Xenia Onatopp and General Arkady Ourumov(and Natalya Simonova). Is a serious threat to the entire world. He could even be the deadliest person alive…..
5.) Defense Minister Mishkin: This Russian Politburo Member intends on finding out exactly what happened at Severnaya. Even though he suspects General Ourumov, he still must lead out an investigation at the St. Petersburg Archives.
6.) Xenia Onatopp: She has theighs of steel, so you better stay out of their grasp. Was a former pilot of the Soviet Air Force, now is a Janus Operative. She is waiting in the Cuban Jungle……….
7.) General Arkady Ourumov: Was formally the head of the Soviet Space Weapons Divison until the Politburo suspected him of the Severnaya incident. Was not aware that Natayla Simonova witnessed the incedent, he is now out to find and kill her. He is the traitor of the Soviet Space Weapons Division and of the entire country of Russia.
8.) Valentin Zukosky: During the cold war in the early 60`s through the 70`s, he was a member of the KGB. He now operates an arms business near St. Petersburg, but has a permanent limp as a result to a past encounter with James Bond. He doesn`t want to have another limp with the other leg(I think), so he agrees to work with Bond. He claims “I like to see my compitition out of business”, but I think the opposite.
9.) May Day: Not much is known about this character except that she is in the multiplayer mode, NOT the main game. I repeat, she is NOT in the main game prior to previous belief.
10.) Jaws: This huge character will not bark, just bite! He has jaws of steel, literally, and can only be found in Aztec Complex in the Main Game and as a character in Mutliplayer mode. He isn`t exactly the best choice for multiplayer because since he is so big, he is an easy target to hit.
11.) Odd-Job: This little-man is quite odd. He is the smallest of all the characters, and he CANNOT be found in the main game. I highly recommend him in multiplayer because he is so small, it is hard to kill him.
12.) Baron Samedi: He, too, is very odd. Not much is known about his witch-craft or himself, except that he can be found in the Temple in the main game.
13.) Russian Soldier: The most common of all the Russian bad-guys.
14.) Russian Infantry
15.) Scientist 1: Can be found in the Facility stage.(Male)
16.) Scientist 2: Can also be found in the Facility stage.(Female)
17.) Russian Commander: Can be found in the Bunker and the Dam stages.
18.) Janus Marine: A Janus Operative. Can be found in Statue and possibly the Depot and Train stages.
19.) Naval Officer: Can be found in the Frigate stage(La Fayette).
20.) Helicopter Pilot. Cannot be found in the main game.
21.) St. Petersburg Guard: Can be found in the Statue level.
22.) Civilian 1: Can be found in the streets stage.
23.) Civilian 2: Can be found in the streets stage.
24.) Civilian 3: Can be found in the streets stage.
25.) Civilian 4: Can be found in the streets stage.
26.) Siberian Guard 1: Can be found in the Dam stage.
27.) Artic Commando
28.) Siberian Guard 2: Can be found in the Dam stage.
29.) Siberian Special Forces: Can be found in the Surface stage.
30.) Jungle Commando: Can be found in the Jungle stage.
31.) Janus Special Forces
32.) Moonraker Elite 1: Can be found in the Aztec Complex stage.
33.) Moonraker Elite 2: Can be found in the Aztec Complex stage.
There are more, about 31 more, however you will need the 64 characters code which can be found in the codes section.
Goldeneye Mission #1
Goldeneye007 Mission #1 begins in Arkangelsk and is divided into 3 subsections: the dam; the facility; and the runway. Within each subsection you`ll find various goals that must be achieved and a wide range of obstacles and enemies to overcome.
The Dam: Agent Level
OBJECTIVE: Bungee jump from platform.
At the first guard tower you`ll find a sniper rifle . Grab it. It`s useful for long range firing. At the second guard tower you`ll find body armor lying on the floor. Grab it. Most of the box crates contain weaponry or ammo. Take it. You cannot get enough. To activate the security walls, walk up to the control panel and hit the green button on your controller. To move through the fence(s) do the same. You`ll need to shoot the lock off the last fence in order to get to the dam.
You should now be on the dam. You`ll have to pass two guard towers to get to the launching pad for the bungee jump. It will be on your left.
The Dam: Secret Agent Level
Objective #1–Neutralize all alarms
Objective #2–Bunjee jump from platform
Repeat the same steps you took in Agent Level, but now you must also destroy the 4 alarm boxes. One is located before you get to the dam, and the other three are located in the guard towers.
The Dam: `00 Agent` Level
Objective #1–Neutralize all alarms
Objective #2–Install covert modem
Objective #3–Intercept data backup
Objective #4–Bungee jump from platform
The Facility: Agent Level
Objective #1–Gain entry to laboratory area
Objective #2– Contact double agent
Objective #3–Renevous with 006
Objective #4– Destroy the bottling tanks
Objective #5–Minimize Scientist Casualties
Leave the bathroom and begin your search of the lower lobby area. Pick up body armor and more weaponry. One soldier will have a security card that you`ll need. Look for him to drop it and then you will have to scoop it up. After about 10 minutes of running around…if you go back up to the bathroom and check the stalls, you`ll find a frightened scientist who drops his security level card. You`ll need that one also. With both security cards you can now access the rusty iron doors that will take you into the bottling areas. There, look for Dr. Doak. (Only on Secret Agent and `00` Agent levels is this necessary) He`s a scientist doubling for the good guys. He`ll give you a door decoder. It will help you gain access to the bottling plant. Once inside the bottling plant, plant your remote mines on the tanks. Only detonate them when Alec is far away from them. If you accidentally blow him up you fail the mission. Escape on the conveyor belt.
The Runway: Agent Level
On AGENT level you`ll have just two objectives: find the plane`s ignition key and escape in the light aircraft. It`s possible to escape the runway without destroying the bunkers from which the soldiers will be shooting at you. Here`s a step by step guide on what to do:
Carefully look to your right. There will be a guard directly to your right or hiding in an inlet. He`ll have grenades to pick off, plus a box of timed mines are sitting on the floor. Grab them.
You then need to leave the facility. You can slide down the ramp like in the movie or you can open a bay door. The noise of opening the bay door will definitely attract more soldiers. I suggest sliding down the ramp.
The airplane ignition key is in the building directly on your left. There`s a guard patroling outside the building and two inside. Be careful. The key is lying on the table.
Unless you`re prepared to shoot it out, there just happens to be a tank located at the far end of the bottling plant. Run to it and jump in.
Use the “A” button (blue) to change your firing mechanism from your gun hand to the cannon mounted on the tank. From here you will encounter heavy opposition. The plane is located halfway down the runway.
You can simply fire at the soldiers with the cannon, or still drive the tank while firing from any weapon you have handy. Don`t be afraid of these soldiers. You can run over them with your tank. Oh, they make a squishing sound when you run over them. Ugh!
Drive the tank up carefully next to the plane and get out. Run up to the door and press the “B” button. The plane will then take off. For Secret and 00 Agent levels you may need to knock out the firing bunkers first or they`ll shoot the plane down.
Runway: Secret Agent
Repeat steps from Agent Level, but now you must take out the two missle batteries
Objective #1–Find the plane`s ignition key
Objective #2–Eliminate missle battery
Objective #3– Escape in plane
Runway: `00` Agent Level
Repeat previous steps, but now you must eliminate the three firing trenches.
Objective #1–Find the plane`s ignition key
Objective #2– Destroy the heavy guns
Objective #3–Eliminate missle battery
Objective #4– Escape in plane
Goldeneye Mission #2
Mission #2 begins in Severnaya. The Severnaya level is divided into two subsections: Surface and Bunker.
Surface: Agent Level
Objective #1– Power down the communications dish
Objective#2- Enter the base via the ventilation tower
Surface: Secret Agent and 00 Agent
Objective #1– Power down the communications dish
Objective#2 – Obtain the safe key
Objective#3 – Steal the building plans
Objective#4 – Enter the base via the ventilation tower
Bunker: Agent Level
Objective 1 — Copy Goldeneye key; leave the original
Objective #2 — Photograph main video screen
Bunker: Secret Agent
Objective#1 Disrupt all surveillance equipment
Objective#2 Copy Goldeneye key; leave original
Objective#3 Photograph main video screen
Bunker: `00` Agent
Objective#1 Disrupt all surveillance equipment
Objective#2 Copy Goldeneye key and leave original
Objective#3 Get personnel to activate the computer
Objective#4 Download data from the computer
Objective#5 Photograph main video screen
Goldeneye Mission #3
Mission #3 takes place in Kirghizstan at a missle launch silo.
Silo: Agent Level
Objective #1 – Photograph the satellite
Objective #2 – Minimize Scientist Casualties
Silo: Secret Agent Level
Objective #1 – Photograph the satellite
Objective #2 – Retreive Telemetric Data
Objective #3 – Retreive Satellite Circuitry
Objective #4 – Minimize Scientist Casualties
Silo: `00` Agent
Objective #1–Plant bombs in fuel room
Objective #2–Photopgraph satellite
Objective #3–Obtain telemetric data
Objective #4–Retrieve satellite circuitry
Objective #5- Minimize Scientist Casulties
From the start, bear off to your left. Open door. Take out guard. Grab weapon. Follow the path up the stairs to the first labaratory. You`ll be met with heavy resistance along the way. Once inside Lab #1 get a keycard from one of the scientists to go to the next level of the silo. They`ll drop one in fear of being shot. Also, in the far left hand corner are two circuit boards. Pick them up.
With keycard in hand, go up the stairs and open the door. At interesection turn right and open door. You`re now in the missle silo.Take out guards and open door. Follow path up to the second laboratory. In the laboratory you`ll find body armor in the far left corner. Grab it. Also get a keycard from one of the scientists to get through the door and on to the next corridor.
At intersection hang right. Cross gangway, and proceed into labarotory. You`ll get yet another key card here, but peek around for a scientist hiding in a corner. He`s got a DAT that will prove vital for missions other than AGENT level.
Repeat the previous movements. At lab 4 you`ll find the Goldeneye satellite suspended in a blue harness. Pull out your camera and photograh it. Move up the stairs to the door. Open it. Ourumov will be with guards in the hallway. You can`t kill Orumov at this stage of the game, but you can shoot his briefcase away from him which may prove useful on missions of more dangerous levels.
At the intersection, turn left. Orumov should`ve fled that way. At Lab #5 all you need to do is manuever around the computers. In a side passage there will be an elevator. Get to it. That`s your escape route from this mission.
Goldeneye007 Mission #4
Mission #4 takes place in Monte Carlo aboard the LaFayette Frigate.
Frigate: Agent Level
Objective #1 – Rescue Hostages
Objective #2 – Plant tracking device on helicopter
Frigate: Secret and 00 Agent
Objective #1 Resuce the Hostages Objective #2 Disarm the bridge bomb Disarm the engine room bomb Plant the tracking device on the helicopter
Miscellaneous Tips
Learn to differentiate between a hostage and a captor. If you kill a hostage your mission is a failure. If you allow too many hostages to be killed by the guards your mission could also be a failure. When you see a gaurd aiming at a hostage you must act quickly, decisively and with good aim. These guards will shoot hostages so act fast!
You`ll automatically be armed with a tracking device on this mission. The Pirate Helicopter is on the bow of the ship. Come up close to it, choose the tracking device from the menu found in your laser watch, and plant it on the helicopter. Your mission will be a success when you`ve rescued at least one hostage and gotten back on the boat you got out of.
Goldeneye007 Mission #5
Mission #5 takes you back to Severnaya. This mission is again divided into two subsections: Bunker and Surface.
Surface: Agent Level
Objective #1–Break bunker communications link
But there are three other benefits that are exclusively particular to purchasing this levitra 20 mg. It is a known fact that sex problems occur super active tadalafil http://amerikabulteni.com/2011/07/17/jennifer-lopez-marc-anthony-divorcing/ as the age grow. Controlling diabetes through diet, exercise and medicines is therefore very important. Achieve Optimum Bliss with your Partner with listless erection. Objective #2–Gain entry into the bunker
Surface: Secret Agent
Objective #1 – Break bunker communications link
Objective #2 – Disable support helicopter
Objective #3 – Gain entry into the bunker
Surface: 00 Agent
Objective #1 – Disrupt all surveillance equipment
Objective #2 – Break bunker communications link
Objective #3 – Disable support helicopter
Objective #4 – Gain entry into the bunker
How do you disrupt the surveillance equipment? Shoot the cameras! It`ll help cut down on the amount of guards that are able to find you.
How do you break the communications link? Go into the satelite dish control center (but do this only after you`ve gotten a security key card off a soldier), shoot up the equipment and leave. Sounds easy enough? Wrong. If you don`t shoot the computer and radio console before it comes on then it means you`ve been spotted and at that point, no matter how much you shoot the console to pieces, you will not be able to break the link.
Disable the helicopter? There`ll be a helicopter ready to take off. Pick a timed mine and latch it onto the helicopter, then run for cover into the bunker.Once inside the bunker you will be put in a jail cell next to Natalya.
Bunker: Agent Level
Objective #1 – Get CCTV Tape
Objective #2 – Escape with Natalya
Bunker: Secret Agent Level
Objective #1 – Compare Staff/Casualty List
Objective #2 – Recover the CCTV Tape
Objective #3 – Disable security cameras
Objective #4 – Escape with Natalya
Bunker: 00 Agent Level
Objective #1 Compare Staff/Casualty List Objective #2 – Recover the CCTV Tape Objective #3 – Disable Security Cameras Objective #4 – Recover the Goldeneye Operations Manual Objective #5 – Escape With Natalya
In your jail cell…go over and talk to Natalya. Then call the guard over to your cell. Pick your magetic watch from the menu. It`ll stealthily pull away the jail cell key from his body. Open your cell, but before you do, get yourself ready for hand to hand combat. You have no gun and the guard does. So, after opening the jail cell the guard will fire upon you. Run towards him and karate chop him. Grab his gun. Leave Natalya in the cell until you accomplish getting the CCTV tapes. She`ll just get in the way and get shot to death and then you`ll fail the mission.
Once you`ve busted Natalya out (with the key to her cell, not yours) your escape route should take you back to the Operations Center where they activate the Goldeneye. Natalya, who should be right behind you, will make a beeline for the computer console. Don`t bother trying to stop her. Why? Two reasons. The game designers programmed the scenario to go this way and also she`s a woman and is going to do whatever she wants anyway. Natalya will head over to the console and realize Ourumov activated the Goldeneye to fire upon Severnaya in 1 minute. You both have to escape. Stay in front of or behind Natalya depending upon where the shots are coming from. You`ve got body armor and she doesn`t, so you`ll need to provide cover for her. Open the glass doors, head down the corridor and up the stairs out into the night.
Goldeneye007 Mission #6
Mission #6 takes you to St. Petersburg. This misison is divided into five subsections. They are Statue Park, Military Archives, Streets, Depot, and Train.
Statue Park: Agent, Secret and 00 Agent Levels
Objective #1 – Contact Valentin
Objective #2 – Confront and unmask Janus
Objective #3 – Locate the Pirate Helicopter
Objective #4 – Resuce Natalya
Objective #5 – Locate Flight Recoder
Statue Park is very disorienting. Sort of moody or spooky and a virtual maze to go through. But here goes:
Valentine will be hiding inside of an opened, reddish colored box car. He`ll tell you where to meet Janus. Janus won`t meet you there until you`ve spoken with Valentine.
Use Lenin`s statue for cover, but you`ll have to drop your weapon, or else Janus won`t reveal his true identity to you. Once he has, then you can take up a defensive stance.
The helicopter is back at the park gates. You`ll need to memorize your route in order to get back to the helicopter in under 3 minutes(that`s when the helicopter is set to detonate).
A proximity mine is attached to the helicopter, so even if you make it to the helicopter with time to spare, the countdown clock will automatically reset to 15 seconds. Wake up Natalya and hide behind a statue.
After the helicopter explodes, you`ll need to get the flight recording data. The explosion will have thrown the data box (orange, with handles) clear away from the helicopter and somewhere at the bottom of the hill. Check around statues and poles. It`s there.
Once you`ve gotten the box, head back up to the gates to get Natalya. She will be held at gunpoint. DO NOT SHOOT! These are Mishkin`s guards who just want to talk to you. Lower your weapon and walk through the park gates. Mission Accomplished!
Military Archives: Agent Level
Objective #1–Escape from Interrogation room
Objective #2–Find Natalya
Objective #3–Escape with Natalya
Military Archives: Secret and 00 Agent Level
Objective #1–Escape from Interrogation room
Objective #2–Find Natalya
Objective #3–Recover the Helicopter Flight Recorder Data
Objective #4–Escape With Natalya
Unlike the movie, the two guards monitoring you in the interrogation room are not friendly, nor aligned with Mishkin. So, grab the weapon, dispatch the guards, and TRY to escape.
There will be a ton of guards in this corridor on you like fireflies. Better be prepared for a fight. In the room directly across the hall is some body armor. Get in there and grab it!
During several run throughs of this mission, i`ve run to the end of the corridor and hid under the stairwell. From that vantage point you can get guards coming down the stairs, plus use them to protect yourself from other guards at the far end of the hall from where you`ve just come. In a last ditch emergency only would I suggest hiding underneath the stairs. It seems to get the game in a rut, and a non stop continous line of soldiers run down it trying to kill you.
Natalya is in a room, behind an iron door, being held hostage. She`s at gunpoint, so you`ll need to get her guard first.
Once you`ve taken care of the guards, you and Natalya can shoot out the windows and jump to safety
Before leaving the archives you can find Mishkin and talk to him but it`s not necessary to accomplish this (Agent) mission.
Streets: Agent Level
Objective #1–Pursue Ourumov and Natalya
Objective #2–Minimize Civilian Casualties
Streets: Secret and 00 Agent
Objective #1 – Contact Valentin
Objective #2 – Pursue Ourumov and Natalya
Objective #3 – Minimize Civilian Casualties
After taking out several guards, you may want to get into the tank. You`ll have under 5 minutes to locate Ourumov and Natalya.
The path you`ll need to take is complicated, but here goes. Once onto the street, turn right. Keep following the streets. Make a left at the first street where you have a left hand turn option. Follow that path and turn right when you come to your first right hand turn option. At your very next first right hand turn option you`ll come across the train depot. Drive to the end. Mission Accomplished!
If for some reason you get a late start and lose large amounts of time…. Valentine is hiding in a building. Get out of the tank (or drive in the alleys for the more adventurous) and pull up to a building that looks like a theater. Valentine is inside and will call his people to delay Ourumov. That will reset your game time back to 5 more minutes.
Where exactly is Valentine located? Well, if you are coming just out of the archives building and onto the street, hang left and run (or drive) in between the buildings. He`ll be about a quarter mile down on the left.
Try not to run over civilians or land mines (the blue discs on the ground) The noise that sounds like Roman Candles going off are surface to air missles being aimed at the tank. Too many direct hits and your dead.
Depot: Agent Level
Objective #1 – Locate Trevelyan`s Train
Depot: Secret Agent Level
Objective #1 – Destroy the Computer Network
Objective #2 – Obtain the Safe Key
Objective #3 – Recover the Helicopter Blueprints
Objective #4 – Locate Trevelyan`s train
Depot: 00 Agent Level
Objective #1 – Destroy the Illegal Arms Cache
Objective #2 – Destroy the Computer Network
Objective #3 – Obtain the Safe Key
Objective #4 – Recover the Helicopter Blueprints
Objective #5 – Locate Trevelyan`s train
For 00 Agents and the Truly Daring: You`ve tracked down the Janus Base, including Natalya and Ourumov. They, plus Alec and Onatopp have boarded a train somewhere around the disused depot.
You`ll have five things to do in 00 Agent Difficulty. Destroy Illegal Arms Cache, Destroy Janus Computer Network, Find Safe Key, Recover Helicopter Blueprints, and Find Trevelyan`s Train. No problem; it`ll just give you more time to listen to this level`s music!
First, after eliminating the Janus Marines in the first compartment, leave by way of the gates and turn right. Keep going until you get to the second supply warehouse. In here is the Arms Cache (Did I mention it`s illegal?) Eliminate any lingering Marines inside and pick up the Rocket Launcher w/ Three Rockets. Walk back to a safe distance and blow up the brown ammo boxes with your D5K Deutsche. Remember to blow up ALL of the boxes or you won`t complete the mission.
Objective A: Complete.
Oh, by the way, don`t bother picking up the KF7 Soviets on the other three tables, okay? They don`t have any bullets in them. Open the door and be prepared to shoot. Janus Marines know your whereabouts, and will be waiting right at the door. After eliminating everyone in the vicinity, turn left and go straight to the last supply warehouse. Inside, Janus`s Computer Network is hacking from MI6 and will know all of their weaponry. Kill the Marines, then use your Rocket Launcher to destroy the turret gun. Then blow up the computer screen with the world map on it, and then the two Mainframes.
Objective B: Complete.
Then walk over to one of the computer desks and pick up the Safe Key.
Objective C: Complete.
Run back to where you found the Arms Cache, but this time, turn left. Enter the large empty building and go upstairs. Instead of entering the nearest door, turn left from it and open the safe. Turns out Janus is planning to build a bigger and better Pirate Helicopter. Grab the Blueprints for it.
Objective D: Complete.
Now enter the door, go down the stairs and open the door to reveal Trevelyan`s Covert Missile Train. It won`t leave without you.
Objective E: Complete.
Kill the guards inside and walk into the train. Now straighten your tie, loosen your cuffs, and you`re on your way!
Train: Agent Level
Objective #1–Disable the brake units
Objective #2–Rescue Natalya
Objective #3–Escape from the train
Train: Secret Agent
Objective #1 – Destroy the brake units
Objective #2 – Resuce Natalya
Objective #3 – Locate Janus`s secret base
Objective #4 – Escape to safety
Train: 00 Agent Level
Objective #1 Destroy the brake units
Objective #2 – Rescue Natalya
Objective #3 – Locate Janus`s secret base
Objective #4 – Crack Boris`s password
Objective #5 – Escape to safety
Each of the 6 train cars has a handbrake unit. You must destroy all 6 units in order to stop the train.
Natalya will be held at gunpoint by Ourumov. When Ourumov warns you to stop moving, STOP MOVING. Take aim at him and fire. Then fire at Xenia. If you hit her, you`ll gain extra time in escaping from the train. And you`ll need every second you can get.
Natalya will crack Boris` passwords. You just concentrate on opening that white square hatch in the corner. It`s locked down tight by nearly a dozen hinges. Use your laser wrist watch to burn off the hinges. Wait for Natalya to say she has Boris` password and then make a run for it!
Goldeneye007 Mission #7
Jungle: Agent Level
Objective #1 – Destroy the Drone Guns
Objective #2 – Eliminate Xenia
Objective #3 – Escort Natalya to Janus Base
Jungle: Secret and 00 Agent
Objective #1 – Destroy the Drone Guns
Objective #2 – Eliminate Xenia
Objective #3 – Blow up Ammo Dump
Objective #4 – Escort Natalya to Janus Base
There are multiple drone guns you must destroy. Run for cover once you hear incessant firing and look for where it is being fired from. Shoot all drone guns to complete Objective A.
The Janus Syndicate has a dangerous Assault Rifle– It would be perfect to use. Loud, but effective. Halfway across the bridge, Xenia Onatopp will call out to you. She hides behind a tree and will uncover herself. Use your automatic to fire on her, until she is fallen dead. That will complete Objective B.
Xenia is a devastating charcter. Even more deadly than in the film, and she`s virtually impossible to take on straight away. But Xenia has one weakness that can be exploited to your advantage: she won`t shoot diagonally across the bridge. Stand at the end of bridge and wait for Xenia to appear. Move to the left or right of the bridge and use the AR33 as Xenia tries to cross. She won`t return fire from the bridge unless you stand directly in front of her.
If your can kill her before she crosses over to your side, you can pick up her grendade launcher. Otherwise, you may have to get creative with your remote mines to destroy her. On Secret Agent level i`ve placed a remote mine at the end of the bridge, then ran backwards. I detonate the mine right as she crosses over it. That may help weaken her some. She`ll still survive it. From there you need to use the AR33 to keep firing away at her. I`ve found it effective to hide behind trees and let them take the full brunt of her assault. With a few shots from Natalya, Xenia usually goes down.
As soon as you cross the bridge, directly on your left there will be a drone gun hiding behind a tree. Take it out. Move forward and then on your right will be the cove where the ammo dump is. There is a drone gun inside the cove deeply hidden in the darkest parts of the cove. If you have your rocket launcher with you it may be wise to fire off as many rounds as possible here to help clear out any obstacles.
Walk up the pathway but be careful. On SECRET AGENT level there are two guards at the top. There`s also a step ladder. Climb it, but just as you reach the top, peek over. Don`t fully expose your presence. There`s a drone gun aimed right at you (on SECRET AGENT level) and another one behind and to the right of this one (on AGENT level). Also on SECRET AGENT level, there will be rectangular shaped boxes lying on the ground in the same area as the two drone guns. Destroy these boxes to complete objective C (on AGENT level). Finally, to complete the mission, run to the end of the jungle and enter the elevator.
Control Center: Agent, Secret and 00 Agent Levels
On SECRET AGENT level secure the area by shooting all the guards when out of the elevator. There will be 6 guards outside of the elevator, plus 3 drone guns suspended from the ceiling in hard to see areas. Once you take care of them, go back to the elevator and get Natalya. She won`t leave until you have secured the area.
Natalya will open a security blast door, so follow her orders and get to the control center of the base. She`ll stay behind. Natalya can only open one blast door. The rest will open only after you have completed certain tasks.
On the way, multiple guards will hide behind boxes, holding hand grenades. Defeat them and take the grenades. When you go through the security door Natalya has opened for you, there will be a long hall with a box of remote mines at the end. You`ll need them, and to get them you`ll have to take on a half dozen or more guards.
Boris will be there and try to shoot you, but he isn`t skilled at firearms and will drop the gun. Drop your guard and he will run away. Chase him and he`ll uncover body armor for you. Don`t kill him, or Natalya will refuse to help you.
There will be 6 armored mainframes you`ll need to destroy. Only 5 of them can be destroyed before Natalya comes back into play. Two are on the middle floor and two are on the bottom floor. One is behind the only security door that you`ll be able to access. Watch out! There are drone guns suspended from the ceiling! Mainframe number 5 is inside this room.
My next suggestion would be to prepare yourself for Natalya`s arrival. This part of the game is one of THE HARDEST stages you`re likely to encounter. You see, Natalya is the only one capable of destroying the Goldeneye, and she`ll be on the computer the whole time.
Guards will come from all angles to shoot her, so your best bet is to prepare the area to maximize every angle to your advantage. Blow up all the legs from underneath the computer tables except for the front/center computer console. This is where Natalya will work, and it will give you a clearer shot as all the guards start pouring in to kill you. Once you`ve got the computer area ready, go up the right hand staircase( if you are looking at the giant video screen) and open the security door. Natalya will exclaim: James, i`m coming!
Find where Natalya is and she will automatically open the door. She will make sure the GoldenEye is realigned to burn up in Earth`s atmosphere. She will activate the security systems. Protect her from any guards until she cracks the GoldenEye`s code and leaves. This completes Objectives A and B. Once she has realigned the satellite, she`ll take off, unharmed, and you`ll have to blow up the last mainframe. It`s on the bottom floor, behind a door previously inaccessible. Take your grenades or remote mines to blow up the Mainframes. This completes Objective C.
Leave by going through one of the blast doors and go across the room. Once Trevelyan says, “Too Slow, 007!”, go back to the other end of the room and escape through the elevator.
Water Caverns: Agent Level
Objective #1 – Minimize Scientist Casualties
Water Caverns: Secret Agent
Objective #1 – Destroy the Inlet Pump Controls
Objective #2 – Destroy the Outlet Pump Controls
Objective #3 – Destroy the Master Control Console
Objective #4 – Minimize Scientist Casualties
Water Caverns: `00` Agent
Objective #1 – Destroy the Inlet Pump Controls
Objective #2 – Destroy the Outlet Pump Controls
Objective #3 – Destroy the Master Conrol Console
Objective #4 – Use the radio to contact Jack Wade
Objective #5 – Minimize Scientist Casualties
Antenna Cradle: Agent, Secret, and 00 Agent Levels
Objective #1 – Destroy the Control Console
Objective #2 – Settle the score with Trevelyan
Immediately beginning this phase, there is some body armor directly behind you. Grab it! Once you reach the top of the cradle, Alec will activate the Goldeneye to go off in 3 minutes. The computer console is located inside one of two sheds. It`s protected by two drone guns suspended from the ceiling. Knockout the drone guns and destroy the computer console. Objective A completed.
There is body armor on the floor of the other shed. Grab it!
Only shots fired at close range will affect Trevelyan. They won`t kill him, but it will take several attempts at this before Trevelyan finally initiates the final part of the game: the ladder.
He`ll drop down several hundred feet while hanging onto the ladder. Follow him. But you better have your guns ready, because you`ll have only one chance to pick him off on the antenna or he`ll blow you off.
Goldeneye007 Aztec Mission (Bonus)
This secret mission opens up after beating all regular GoldenEye levels on Secret Agent Difficulty.The Drax Corperation is still operating, and they`ve got the best of the Moonraker Elite on this one– they`re armed with AR33s and they`re not afraid to use them.
Plus the best weapon, second only to the Golden Gun,is available in this mission. The Moonraker Laser can kill a regular trooper in one or two shots. You`re great with them, but the Elite are extremely deadly.
As soon as eliminating the Elite in the first two rooms, go across the stone board on the large hole and open up the wall on the other side. Eliminate the troops in the computer room and go into the mainframe by firing a few shots into it to attract attention.
Destroy the computer on the left in the room under the NASA Shuttle and run into the grating. Destroy the turrets on either side and watch out for the Moonraker Elite. Turn right to find some body armor.
Go to the left and enter the shuttle room, destroy the turrets, and defeat the Moonraker Elite. Go up the ladder and activate the computer to close the exhaust bay. Go down the ladder, and into the grating on the opposite side of the room.
Go down the stairs and you`ll find your good pal Jaws. Shoot him once with the laser and back into the shadows you go. As soon as he comes to get you, get close and start firing. His arms are too long, so it`ll be easier that way.
After eliminating Jaws, a silent alarm is activated and multiple guards with lasers will come after you. Grab the Smart Card from Jaws and run back to the computer room and place the Guidance Data Floppy Disk in the disk compartment.
Objective A: Complete.
Grab the Launch Protocol DAT from the computer desk and run back to the shuttle room. Go up the ladder, activate the computer to open the exhaust bay, and run across the room to the mainframe. Put in the DAT and run into a grating. The shuttle will blast off in thirty seconds. Guards will be a lot more abundant now, and be aware you still can die during this period, so be careful and fast.
There is no exit to this mission, but you will complete and exit the mission once the shuttle timer reaches zero.
Objective B: Complete.
Goldeneye007 Cheats
Cradle level with Gameshark: Turn on the code “Have all objectives done.” Also, turn on slow motion. Invisibility helps a lot, too. What you do is go to the control console in the room and destroy it. After you are done with that, you follow Trevelyan down the ramp and kill him. If he won`t die, the “All Weapons” Cheat will help. After you have successfully killed him, meet where the helicopter would pick you up. What should happen is Bond will be walking in slow motion to the helicopter and the helicopter should take off without him and you should still beat the level —-sent in by ???
Invisible mines: When you find an ammo crate, throw a mine on it. After you have completed that, get the crate(you won`t be getting the mine).Now, look around and see if you can find it. If you did everything right, the mine shoud appear to not be there. Just step back,and let her blow!
Flying mines: Throw a mine on a window. Then shoot the window out. The mine should not blow up, and should be floating in the air. Step back and blow it up!
Take a gun, find a scientist, shoot him in the leg twice, he pulls out a gun kill him take his gun, which is a DD4D and repeat with another scientist, if the second one is not dead, he takes out grenades. Of course this only works in Secret agent or 00 agent.–sent in by MadCat. Thanks.
If you beat the Aztec Temple on 00 agent and have completed all others on 00 agent, You go to the Egyptian Temple ,Home of the Golden Gun and of Baron Scaramanga!! He has 3 lives and ends up in 3 differents spots! —sent in by Roxanne Mundt.
If you have a gun that youcan hold 2 of, switch weapons superfast then fire. If it fires while you are switching, the weapons will lock, giving you a different weapon in each hand!—sent in Roxanne Mundt.
if you`re in Multiplayer, shoot ammo boxes (not explosives in boxes) in may split into two!—sent in by Roxanne Mundt.
2x weapon code: To do it, you`ll have to have two sets of double weapons such as two Automatic Shotguns and two Sniper Rifles.This is a difficult trick to perform, so if you cant git it to work the first time, try it again and make some subtle changes to your timing. First, activate the second set of weapons you`d like to have and then press the A button. But beforethe gun rotates away press the Z trigger twice then release the A button but as soon and again AS SOON as you take your finger off the A buttn tap it again and then press the Z trigger until both weapons lock. If your timing is perfect you should have twop different sets of weapons.—sent in by Kid Comet!
Facility: Invincibility: Skip the intro movies and run straight for the hole in the ventilation system. As you are falling, open the door, and run out of the bathroom. Run straight down the stairs, strafing around the boxes on the left and right into the room below. Kill the guard with the keycard as soon as you can, making sure not to put a bullet in the wall. Otherwise, guards from the bathroom will run downstairs to kill you. After getting the keycard, run straight into the room with the security door switch, ignoring the guards inside completely. When you get to the small room with the lockers and two guards, ignore them and get out your mines. Open the door leading to the hall with three guards and throw a mine. While the mine is in mid-air and close to them, press A, B, and R at the same time to detonate the mine. Run into the room with the intersection, and take a left down that hall. Kill the guard in the corner, pull out your KF7 Soviet, and shoot the glass near the door. This will alert a guard on the other side. He will open the door. Cycle backwards (A and Z) with your weapons to the silenced PP7 and shoot the guard while he opens the door. Run upstairs into the lab, killing all but the scientists with your PP7. If you don`t find Dr. Doak, you have to start the level over again. If he is there (he can be in one of two glass rooms, or in the hall), the minute you get the decoder run straight for the decoder door. When you meet Trevelyan, start setting mines on the floor inbetween four gas tanks until you run out of mines. You need to lure Trevelyan away from the gas tanks before you detonate them, otherwise. . . well, you know. Start backing up to the conveyor belt exit, and when objective C is complete, blow the mines and bolt out.
Facility: Another Point of View
1. You will Start off in the vent. Take your first left and then a right to fall into the bathroom. open the stall door as you fall and ignore the gaurds completely.
2. (Be sure that as you leave the bathroom you have your mines equiped). Run out of the bathroom and down the stairway.
3. When you get to the bottom of the stairway look/aim downward and throw a mine. (Don`t throw the mine to close to the computer room door or the remote door opener will blow up). If the mine skips make sure that it is not to close too the computer room door. Take your time to ensure that the mine lands safely, but try not to get shot.
4. At the bottom of the stairs after dropping the mine, turn around to your left and go into the door under the stairway. At the same time you should be switching to PP7 silenced or if you find it easier you may use “unarmed”. (Note: You will find it useful in this level to change weapons by using your “change weopon” & “fire button” to cycle through your weopons backwards). After Entering the door kill the guard (preferably before he shoots) and take his keycard and gun.
5. For best results, wait a few seconds and then (with your detonator) blow up the mine killing all gaurds in the computer room and maybe one in the hall. Switch to your silenced PP7.
6. Run back out into the hall and then into the computer room (the door may or may not be open). Assuming that the computer is still working tag it and run back out into the hall. (Note: you may also find it nessecary to pick up droped ammo) Turn left and shoot any guards in the way as you run down the hall (try to kill but don`t worry if you just injure). Turn left as soon as you can and enter then immediatly exit the room with the remote door. Pass the locker room ignoring the guards and at the same time switch to your KF7 Soviet.
7. This next room is likely to be a drain for your health. Try to stand in the doorway and kill the gaurds as quickly as possible (this is a skill that good players/00Agents aquire). You may run in after killing one or two and take out the remaining opposition. Run to the next door and, to preserve health, instead of opening the door when it is right in front of you, turn to the right or left and tag it there.
8. Inside you should do the same thing to avoid being shot (get to one side of the room). Run out and turn left shooting the guards in your area (if the place is allready flooded with guards try your best to avoid the ones behind you). The noise of the KF7 Soviet should alert the guard on the other side of the security door and convince him to open it for you.
9. Once the door is opened, kill the guard and run into the lab area ignoring the gaurd in front of you. Turn to your right and run up the stairs (positioning this may be difficult). Kill the gaurds at the top as you make your way through the hall. (Long distance shooting may be nessecary to take out far away gaurds). After turning right from the long stretch of hallway, you should be able to see the glass windows of the laboratory.
10. Continue down the hall until you get to the area with two gaurds behind a pilar. Turn right when you get there and look for Doctor Doak. Should he not be there, quickly check the glassed in laboratories for him (you may not survive this task unless it is done quickly and your health is OK). If he is not in any of them your luck has run out and you must restart and try again. If you find Doctor Doak immediatly run up and talk to him. As soon as you say “Time to leave Doctor Doak”, run back to the hall (if you are not already there), and continue along (a left turn from where you originally came from). There will be a few guards in your way and it will be very important to kill them. Your health may be low (mine was). When you get to the bottling room door press “start” and equip your door decoder. Use it by pressing “Z” (Solitare).
11. Now the real pressure begins. As soon as the door is open, go down the stairs and over to the tanks. Begin talking to Alec Trevelyen. There are 10 tanks you must destroy, but only four mines. Place mines on the floor so that they land between four tanks. Then quickly run away from the tanks and try to avoid gunfire if it is there. You should run towards the conveyor belt exit which will be ahead at your right. Wait until Alec says “For England James” and make sure that he is far enough away from the tanks so that the explosions won`t kill him. Don`t worry, you should still have enough time. As soon as he is out of the way, Blow up the tanks with your detonator completing the objective and then run out of the facility on the conveyor belt.
Archives: Invisibility: When the level begins, slap the guard with the key and run out of the room before the other guy gets a chance to shoot at you. Remember that you should NEVER fire any weapon on this level. Run out of the interrogation room straight into the large room with two guards. Ignore them and run through the room and upstairs. When you open the door, chances are you will see a guard with twin Klobbs at the end of the hall. If you don`t run down the left hall fast enough, the bullets will knock you back and put your chances of getting invisibility in jeopardy. Ignore the guy with the soviet and run out of the door at the end of the hall. Take a left through the double doors, and find Natalya. Simply open the door, and when she screams “James!” turn around and run out of the double doors you came in by. Take a left down the straightaway to the stairs. Don`t worry if you get hit by bullets–they propell you forward faster more than they do damage. Also, don`t worry if you can`t see Natalya. When you get down the stairs, go right and into a room with bookshelves. The second you enter the room, run left. You should see another door in front of you. Take it, and then go left into the room with Dimitri Mishkin. Wait close to the door, and let him walk to you. While he`s talking, walk to the safe. You should walk to the closest left corner, so when he gives you the key you can open the safe and take the box even before the door opens completely. After taking the box, go right from the safe. The door there will put you into a short hall; pull out your DD4D and open the door at the end of the hall. It will put you into a room with windows and books–blow the windows and run outside. Both of these cheats take several tries, so don`t get discouraged if you don`t make it the first few times.
Disappearing Mines In Multiplayer select remote mines ane when you get them keep piling on top of each other. After about 30 mines they will start to disappear.
The Golden Gun and Baron Samedi in Egypt For the true 00 agents who were able to acquire Egyptian, but can`t seem to reach the Golden Gun, here`s how to get it. Make your way to the Golden Gun room to the right of where you start. When you step on the first tile beyond that narrow hallway, don`t take another step. The entire room is pressure sensitive, save for a few tiles that let you reach the gun safely. From where that tile is, take this path: left 2, forward 2, right 3, forward 2, left 1, forward 1, left 1, forward 2, right 1. This pattern should place you directly in front of the Golden Gun and its box of gold bullets. Take this and start using it immediately–you can kill everyone in one shot! Exit the room via the left exit (it has the same silver square as the door you came in) and pick up the body armor, and then continue out of that hall. You should drop down into a huge room. Run straight out until you see (and hear) Baron Samedi. Shoot him once (that`s all it should take, with the Golden Gun) and then go back to the room you started in. Baron has reappeared, and is back for more. Kill him this time, and the lights go out (not that you can avoid this). Now, run back to where Samedi was in the beginning. Check for any discoloration along the walls (you might want to try this before the lights go out), and try to open it like you would a door. The panel slides aside, allowing access to a long hall. There are several holes on the right side of the hall–they are there so drone guns have an open shot at you. Ignore them (not doing so will cost you time and energy) and take a left at the end of a hall. You should see a room with a large black pillar in the middle. Behind it is a stronger Samedi. Kill him and you`ve won. Also, don`t be afraid of getting the all guns cheat–it`s the easiest one to get in the entire game (and be sure to watch the entire ending “movie” for a disturbing clip. . .)—sent in by BrandonBond
20 SECOND TRICK: On the train in 00 agent, you have only 6 seconds after breaking Boris` password to get out with Nataylia alive. To change it to 20 sec, line up Ouromov`s head with Xenia. After shooting Ouromov in the head immediately shoot and kill Xenia. If you did it right you will now have 20 extra seconds, but she`ll (Xenia) appear in Cuba. But if you`re like me and want a challenge and make the make the game look like the movie you`ll try it without this Trick.
AZTEC STAGE: In the Aztec stage go to the second room where there is one man in a hall, one on each side of him and three in the back behind crates. Kill the guy in the hall and the two next to him. Then run out of the hall and directely to the left or right. Go up the little stairs to the platform and stop. The three guys left will aim but wont shoot at you. You can pivot around but don`t move or they will shoot. Then just kill them with your pistol to save ammo and be on your way. Sent in by — Travis Bowers
Rigging the World
In multiplayer you can rig all the devices including guns and ammo. This can only be used with mines but is best used with proximity mines. Pick up a gun or ammo or mines. Remember where it was. Throw a mine on the ammo box or gun. If using proximity mines when the ammo or gun reappears your enemy will see it but hopefully not the mine and get blown to smithereens. This also works on Body Armor. And it blows up the body armor so the enemy or you can`t pick it up for a couple of minutes. –DGGCruz@aol.com
Shoot Tank Shells From Your Forehead
This is a pretty cool glitch that works only in the tank levels (Streets or Runway). You also need to switch the infinite ammo code on. Go to the tank and climb on top. Switch your weapon to the one immediately before the tank shells. Then, while switching to the tank shells, jump off the tank. If you did it right, Bond`s weapon will still be switched to tank shells you`re ready to fire some “big ones” from your forehead.–DGGCruz@aol.com
Shortcut To Invisibility in Archives
When you start out go over to the guy with the key and slap him. Get the key and leave before the other person gets a chance to shoot you. When you open the door take a right. you will see a person standing their, run right past him and go up the steps. You will see a person with two klobbs, ignore him and turn all the way around and go straight. Take a right and go straight and the person standing their. Go through the door and go left through the double doors. Enter and go to the room where Natalya is. Just simply open the door and then open the door to the left of you . Go in to the room and go down the stairs. Ignore the person at the bottom of the stairs. Go straight to the double doors, open them. Go around the bookshelves and go right. Go straight and you will see a door. Go through it and then go left through the other door. Then you should be in the room with Mishkin. Wait till he gives you the key then get the helicopter recorder. Go out the opposite door you came (right behind the safe) then follow that hallway till you get to the door. Open it and pull out your DD44 Dostov and shoot the glass and get out. (hint: dont stop to shoot anyone and never shoot your gun until you get to the window!) —-By: Morgan of Seattle!
Mission 6: The Interrogation Room.
Don`t take the gun. Instead walk over to the first soldier and stand right next to him. He won`t do anything to you at first. Then whack him with your hand, one hit and he will be dead. Then immediately run over to the other soldier. You may need to crouch down to hit him as sometimes he crouches down. Whack him about three times to kill him. Now you have their guns. You can grab the one on the table if you want it. The advantage to doing this rather than grabbing the gun on the table immeadiately is that it will not alert anyone out in the hallway. You can then just walk right out and through the second door to get the armor. If you shoot the guards with the gun on the table you will get into a huge gun fight with the soldiers trying to come into the room. ——Mr. Camaro
More Archives suggestions
I have passed Goldeneye, needless to say my favorite game, and I just wanted to help some people out on an especially difficult level, the Military Archives on 00 Agent. I have found that the easiset and fastest way to beat the mission is to not shoot your gun at anyone at all. This stops the guards and infinite numbers of soldiers from coming as the shooting of the bad guys is for some reason not heard. This may seem a stupid idea, playing the level without any weapon, but it works, all you need is a bit of patience. When you meet a soldier two chops with your hand will usually kill him. This trick can also be used to get the invisibility cheat, you only need to chop the guard right in front of you to get the key, then you must rush out the door, let Natalya see you, talk to Mishkin, who is agonizingly slow, get the flight recorder, pull out any gun you have and shoot the window—-Tomas R.
This is a code I learned from a friend, so I can`t take all the credit. On multiplayer mode, select the bunker level (only for three players) and remote mines as your weapon. Get some mines and head for the large room with the T.V. screens hanging off the ceiling. Place a mine on each T.V. hanging down and detonate them all at once. Toss another mine out in the open. If done correctly, all the mines for the rest of the game will float in the air! This is a great trick to pull on the other players.
66 Characters in Multi-Player
This will double the amount of characters to choose from in Multiplayer mode.
Hold the L and R buttons and press C-Left
Hold the L button and press C-Up
Hold the L and R buttons and press “left” on the D pad
Hold the L button and press “right” on the D pad
Hold the R button and press “down” on the D pad
Hold the L and R buttons and press C-Left
Hold the L button and press C-Up
Hold the Land R buttons and press “right” on the D-pad
Hold the L and R button and press C-Down
Hold the L button and press “down” on the D pad.